BOO!
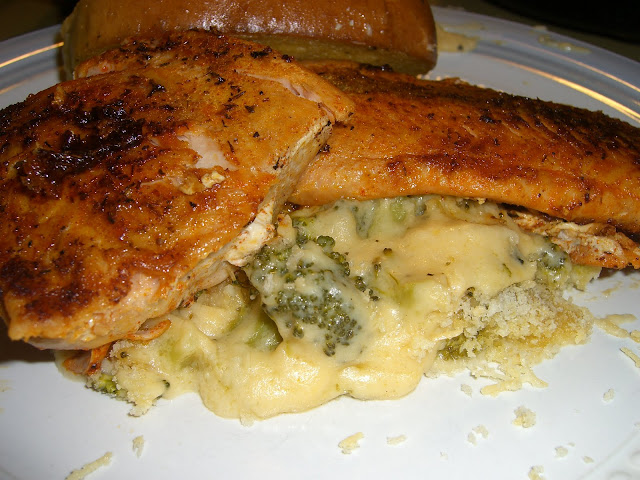
Anyhoo, tonight I thought I'd go easy on my esophagus by pairing the spiciness of the blackened salmon with a creamy, cheesy, broccoli gratin yum yum of goodness. Hey, one can't ever have too many adjectives!
Again I was browsing foodgawker (aka crack for the foodies eyes) and I came upon what would go so great with the blackened salmon, Cheesy Broccoli Gratin straight from Cheri over at Kitchen Comments! There's really no need for my to post that wonderful recipe here since I didn't change a thing (except cheat and add tons more panko bread crumbs, yum-tastic!)
Also I used fresh broccoli instead of the frozen stuff. Not because the frozen stuff isn't good, but more so because that is just what I happened to have lying around in my crisper.
So I just cut that up and followed the recipe as written. Turned out delish!
I also used whole wheat white flour.
The Main Attraction:
Blackened Salmon
For me there really isn't much to the recipe, but kind of more to the technique. If you have a full stock of herbs and spices in your reach than by all means make your own blackened seasoning! There is a great recipe here. Or you can cheat and just buy it premade.
Especially for those of you out there in blogland that are still getting herbs and spices bit by bit. (Like myself)
Step 1. Defrost your salmon if it's frozen. (preferably ahead of time but if you use the microwave i'll never tell!). Also, set your pan on the eye of the stove and turn it on medium heat (4/5)
Step 2. Melt some butter (hell I don't know, two table spoons? More if you're using a cast iron skillet like myself). Then brush the butter on ONE side of the salmon. Technique people! =)
Step 3. On that same buttered side sprinkle the blackened seasoning to your spice tolerance. I personally coat that sh** on there but I think I was creole in a past life.
Step 4. Your pan is hot enough when drops of water dance around the pan and disappear. Now, if you're using a cast iron skillet, pour a little of that melted butter into the pan. (or use Pam if you're fealin' figure friendly). If you're using a non stick pan, a little flicker of butter will do.
Step 5. Set the salmon in the pan. DO NOT MOVE IT! All of those seasonings are forming the most delicious crust. F'in with it will only mess it up! While the salmon is in the pan brush and coat the side facing up.
Step 6. Depending on the thickness of your salmon you should be cooking it up to 6 or 7 minutes on each side. And really, to me, that's pushin' it. If you have an extremely beautiful thick piece of salmon just slap a lid on your pan, and the steam will cook the middle right up. Once one side is cooked, flip it, and DON'T FIDDLE WITH IT! Curiosity killed the cat.
***And just while we're on the subject. Never pick up your fish with these:
If you do your fish will crumble, and if it doesn't crumble that means it's tough as sh**.
Always, always, always, always use a spatula, even when plating.
Step 7. Plate it up and enjoy!
Happy yum yum!


